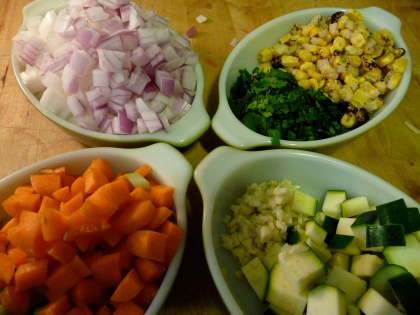
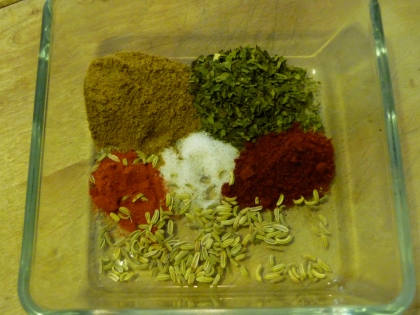
Yuk yuk yuk. That was a terrible pun. Please accept the following recipe with my sincerest apologies.
OK, let's do this:
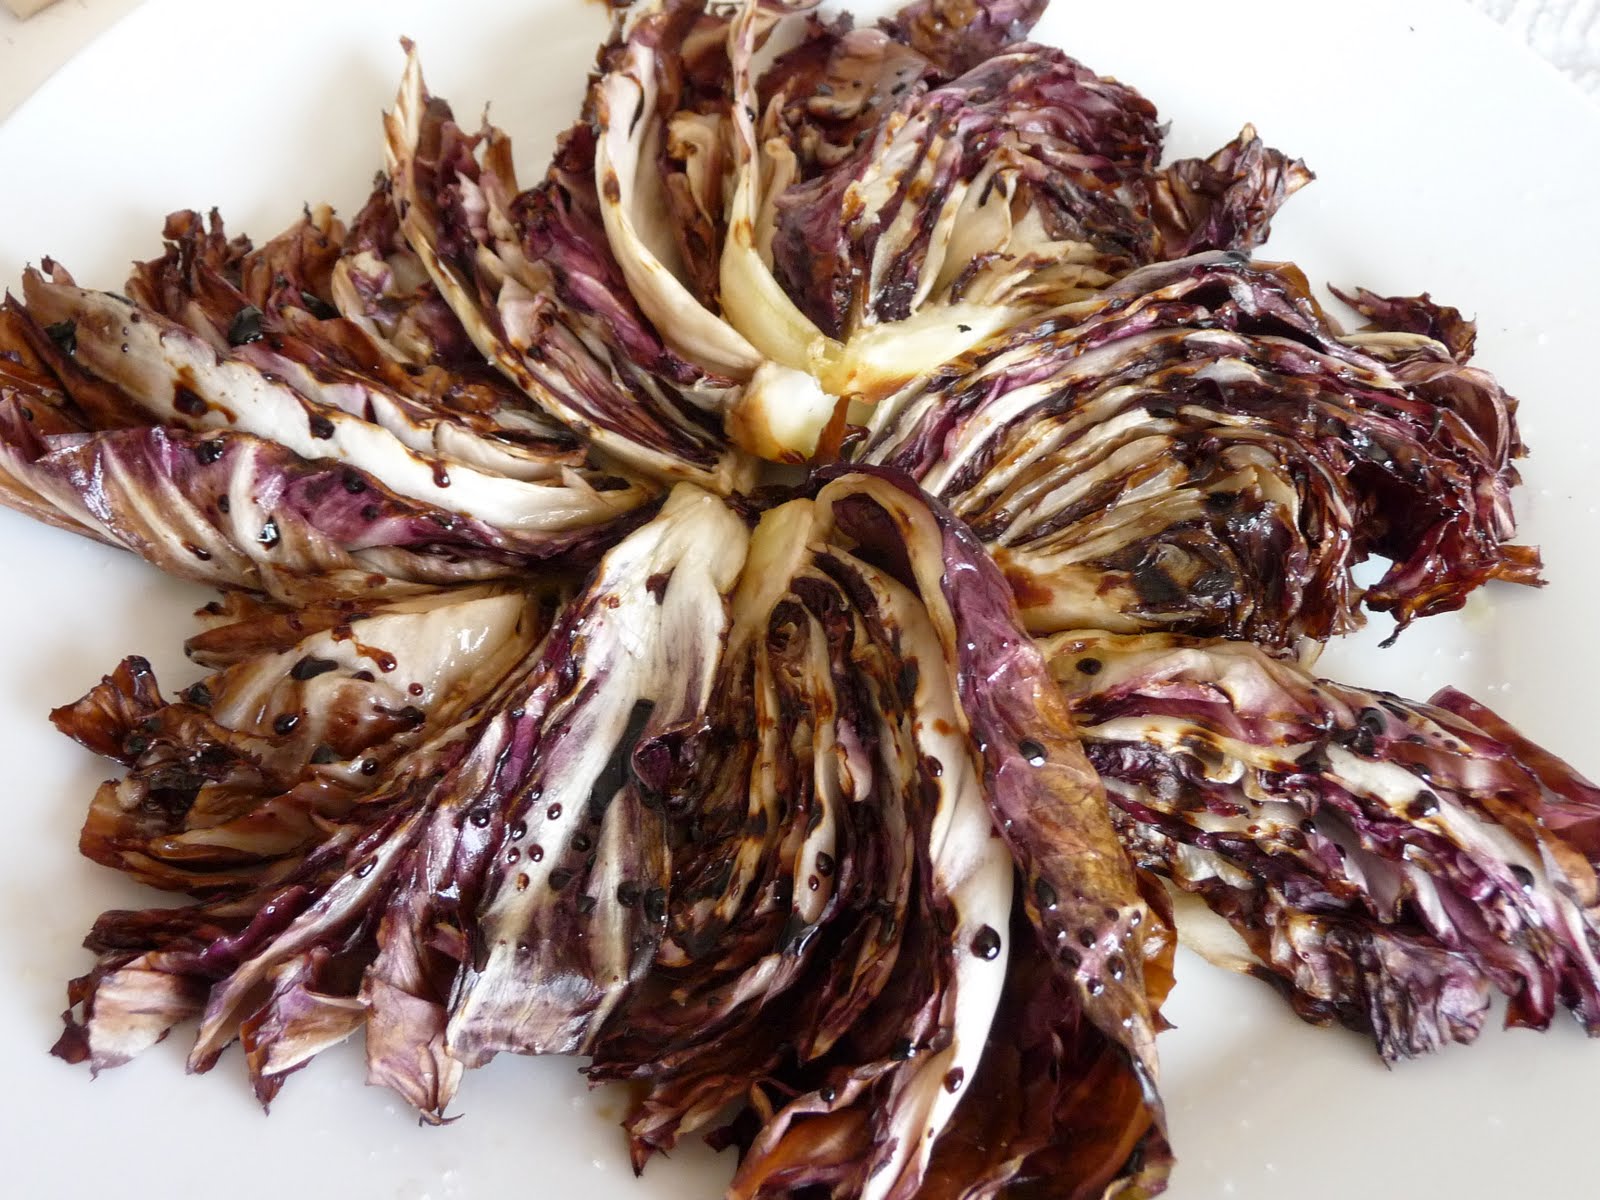
Stupid Easy Grilled Radicchio*:
makes 6-8 servings
total time 8 min
1 head of radicchio
1-2 T olive oil
3 T balsamic vinegar, reduced
coarse sea salt
Fire up the grill. While the grill is warming up, reduce the vinegar. I'm not even going to tell you how to do it. Again. We've been over this, people.
Cut the head of radicchio into 6 or 8 wedges, making sure to keep a little of the core intact on each wedge, otherwise it will fall apart.
Drizzle the wedges with olive oil and grill 3-4 min on each side. Fan out on a plate and drizzle with balsamic reduction and sprinkle with sea salt.
Showing posts with label gluten free. Show all posts
Tuesday, July 5, 2011
Tuesday, June 28, 2011
A Massage with a Happy Ending You Can Be Proud Of
I've figured out what's wrong with the world:
Iceberg lettuce gets a bin at the salad bar while the super food kale is used as decoration. It's backwards and sad just like the fact that Teresa from Real Housewives of NJ has, like, 17 horrible children and Bethenny only has 1. Bethenny is so much better, and so is kale.
Kale packs more of a nutritional punch when it's raw, but trying to eat it just like lettuce is torture. It's a bit much. You've got to massage it a bit.
OK, let's do this:
Stupid Easy Massaged Kale Salad
makes 6 servings
total time 10 min
1 bunch kale, rinsed and patted dry with paper towels, stems removed
1 can chickpeas, rinsed
1 can red kidney beans, rinsed
1 can white kidney beans, rinsed
juice of 1 lemon
1 T red wine vinegar
1 T olive oil
12 black olives, pitted, chopped
1 handful oregano, chopped
After you've washed and dried the kale, tear it into really little pieces with you hands. Next, light some candles, put on some soothing music and massage the pieces. Crush the pieces - it's ok - kale likes it a little rough.
Put the pieces in a bowl and toss with the lemon juice and vinegar. Let it sit while you drain and rinse the beans and chop the olives and oregano.
Combine everything and adjust the flavors if necessary.
Iceberg lettuce gets a bin at the salad bar while the super food kale is used as decoration. It's backwards and sad just like the fact that Teresa from Real Housewives of NJ has, like, 17 horrible children and Bethenny only has 1. Bethenny is so much better, and so is kale.
Kale packs more of a nutritional punch when it's raw, but trying to eat it just like lettuce is torture. It's a bit much. You've got to massage it a bit.
OK, let's do this:
Stupid Easy Massaged Kale Salad
makes 6 servings
total time 10 min
1 bunch kale, rinsed and patted dry with paper towels, stems removed
1 can chickpeas, rinsed
1 can red kidney beans, rinsed
1 can white kidney beans, rinsed
juice of 1 lemon
1 T red wine vinegar
1 T olive oil
12 black olives, pitted, chopped
1 handful oregano, chopped
After you've washed and dried the kale, tear it into really little pieces with you hands. Next, light some candles, put on some soothing music and massage the pieces. Crush the pieces - it's ok - kale likes it a little rough.
Put the pieces in a bowl and toss with the lemon juice and vinegar. Let it sit while you drain and rinse the beans and chop the olives and oregano.
Combine everything and adjust the flavors if necessary.
Labels:
beans,
chickpeas,
garbanzo beans,
gluten free,
kale,
kidney beans,
lemon,
oregano,
salad,
vegan
Monday, May 23, 2011
Stop Buying That Shit!
If you spend about 15 minutes you can make your own go-anywhere snack bars that are chock-full of great vitamins and minerals and happy fats.
Where will you take them? To the gym? to the movies? to your plastic surgery consultation to buy a better rack? Like I said, they go anywhere!
OK, let's do this:
Stupid Easy Energy Bars
makes 10 bars
total time 15 min
1 lb medjool dates, pits removed
1 handful dried berries
5 handfuls of nuts and seeds of your choice, I used:
walnuts
cashews
slivered almonds
pistachios
pumpkin seeds
dried cranderries
2 oz. dark chocolate
Make sure all the pits are removed from the dates and run them in a food processor. This will take a few sessions as dates have a tendency to glob up. If you don't have a food processor chop them up over and over and over until they form a big sticky blob. It will take a while if you do it by hand. Just keep going.
For larger nuts (hee hee), I've found it's better to run them in a food processor until they resemble coarse sand. That's what I did for the cashews and walnuts (bottom left). If you don't have a food processor, put them in a heavy duty plastic bag and smash them with a hammer. Seriously.
Next, melt the chocolate by placing it in a heat proof bowl. Place the bowl in a pot with a small amount of boiling water making sure not to let the water get into the bowl of chocolate.
Now mix all the nuts together in a big bowl. Cut the blob of dates into 4 parts and place it in the bowl of nuts and seeds. Use your hands to mush the nuts into the dates. Add more nuts if it seems like there's enough sticky date surface area. You know when you've reached Maximum Nut Capacity when they stop sticking.
Mash the whole mess out flat on a baking sheet lined with wax paper. Now you can cut them into whatever shape you want. Drizzle with the melted chocolate and refrigerate. Once they're cool, store them in the fridge in an air tight container.
Where will you take them? To the gym? to the movies? to your plastic surgery consultation to buy a better rack? Like I said, they go anywhere!
OK, let's do this:
Stupid Easy Energy Bars
makes 10 bars
total time 15 min
1 lb medjool dates, pits removed
1 handful dried berries
5 handfuls of nuts and seeds of your choice, I used:
walnuts
cashews
slivered almonds
pistachios
pumpkin seeds
dried cranderries
2 oz. dark chocolate
Make sure all the pits are removed from the dates and run them in a food processor. This will take a few sessions as dates have a tendency to glob up. If you don't have a food processor chop them up over and over and over until they form a big sticky blob. It will take a while if you do it by hand. Just keep going.
For larger nuts (hee hee), I've found it's better to run them in a food processor until they resemble coarse sand. That's what I did for the cashews and walnuts (bottom left). If you don't have a food processor, put them in a heavy duty plastic bag and smash them with a hammer. Seriously.
Next, melt the chocolate by placing it in a heat proof bowl. Place the bowl in a pot with a small amount of boiling water making sure not to let the water get into the bowl of chocolate.
Now mix all the nuts together in a big bowl. Cut the blob of dates into 4 parts and place it in the bowl of nuts and seeds. Use your hands to mush the nuts into the dates. Add more nuts if it seems like there's enough sticky date surface area. You know when you've reached Maximum Nut Capacity when they stop sticking.
Mash the whole mess out flat on a baking sheet lined with wax paper. Now you can cut them into whatever shape you want. Drizzle with the melted chocolate and refrigerate. Once they're cool, store them in the fridge in an air tight container.
Monday, May 16, 2011
How to Win Friends & Influence People:
Grill fruit.
Seriously, that's all it takes. Well, that and a nice rack.
OK, let's do this:
Stupid Easy Grilled Apricot Hors d'oeuvre
makes about 20 pieces
total time 20 min
4 apricots, ripe, but not too ripe
fresh mozzarella
2 slices of red onion (don't separate the rings)
1 T olive oil
3 T balsamic vinegar, reduced
salt, pepper
large basil leaves
Fire up the grill to med/high. Don't have a grill? Use a frying pan - you just wont get the grill marks.
Slice the apricots and onion and toss in the olive oil, salt and pepper. Set aside.
Seriously, that's all it takes. Well, that and a nice rack.
OK, let's do this:
Stupid Easy Grilled Apricot Hors d'oeuvre
makes about 20 pieces
total time 20 min
4 apricots, ripe, but not too ripe
fresh mozzarella
2 slices of red onion (don't separate the rings)
1 T olive oil
3 T balsamic vinegar, reduced
salt, pepper
large basil leaves
Fire up the grill to med/high. Don't have a grill? Use a frying pan - you just wont get the grill marks.
Slice the apricots and onion and toss in the olive oil, salt and pepper. Set aside.
Reduce the vinegar over medium heat (about 4 min).
Grill the apricots and onions for about 3 minutes on each side, or until they get the pretty grill marks. Remove from heat.
Cut the grilled onion into smaller pieces and separate the rings so that you have approximately 2 inch long pieces.
Place a piece of onion on the basil leaf, then a piece of fresh mozzarella, then the apricot, then drizzle with the balsamic reduction.
Labels:
apricots,
balsamic,
basil,
gluten free,
grilling,
mozzarella
Monday, May 2, 2011
Oh Snap!
Spring has sprung in a big way here in LA LA land. April showers (and, well, April) are over. Birds are singing, sun is shining and the farmers' markets are exploding with sugar snap peas. Additionally, sangria is flowing, horrible chain restaurants are overflowing with prom dates and Real Housewives of New Jersey starts in just two short weeks. All is right with the world.
OK let's do this:
Stupid Easy Sugar Snap Pea Salad
total time 10 min
makes 4-6 servings
For the sauce:
1 t safflower oil
1/2 sweet onion, diced
1 T ginger, minced
2/3 c coconut milk
medium bunch of cilantro, stems and leaves roughly chopped
1 or 2 t green curry paste
zest and juice from 1 lime
salt, to taste
---------------------------------
1 cup sweet corn kernels
1 red bell pepper, chopped
1 lb sugar snap peas, blanched for 1 min
Heat oil in a large sauce pan over medium heat. Brown the onions, then add the rest of the sauce ingredients. Simmer for 2 minutes, then remove from heat.
Blanch the sugar snap peas (boil for 1 minute, then run under cool water).
Once the sauce has cooled for a few minutes, puree it in your little food processor.
Add the sauce back to the pan over med heat. Add the corn and pepper and simmer until the peppers are tender (about 3 minutes).
Meanwhile, slice the peas on a diagonal and stir in to the sauce. Serve warm or cold.
OK let's do this:
Stupid Easy Sugar Snap Pea Salad
total time 10 min
makes 4-6 servings
For the sauce:
1 t safflower oil
1/2 sweet onion, diced
1 T ginger, minced
2/3 c coconut milk
medium bunch of cilantro, stems and leaves roughly chopped
1 or 2 t green curry paste
zest and juice from 1 lime
salt, to taste
---------------------------------
1 cup sweet corn kernels
1 red bell pepper, chopped
1 lb sugar snap peas, blanched for 1 min
Heat oil in a large sauce pan over medium heat. Brown the onions, then add the rest of the sauce ingredients. Simmer for 2 minutes, then remove from heat.
Blanch the sugar snap peas (boil for 1 minute, then run under cool water).
Once the sauce has cooled for a few minutes, puree it in your little food processor.
Add the sauce back to the pan over med heat. Add the corn and pepper and simmer until the peppers are tender (about 3 minutes).
Meanwhile, slice the peas on a diagonal and stir in to the sauce. Serve warm or cold.
Wednesday, March 23, 2011
Manicotti...kind of....
This is a great entree idea for that pain-in-the ass friend we all have who's suddenly decided she can't eat gluten. You know, the one who sometimes reeks of gin and cigarettes and shame...yeah - your big problem is gluten, sweetie...
Eh, well...you know what they say aboutgin glass houses....
OK, let's do this:
Easier Than It Looks Gluten Free Manicotti
makes 6 servings
prep time 20 min, bake time 35 min
Filling:
1 T olive oil
1/2 red onion, diced
3 handfuls spinach
2 cloves garlic, minced
-----------------
8 oz container ricotta
1 cup shredded parmesan, plus extra for sprinkling
1 t dried oregano
1/4 t salt
1 egg
-----------------
Instead of noodles:
2 large zucchinis sliced very thinly on your little hand slicer
-----------------
marinara sauce, jarred or homemade
fresh basil for garnish
Preheat the oven to 375ºF
Heat the oil in a pan over medium heat and cook the spinach and garlic for about 3 minutes, stirring frequently. Allow it to cool for a couple minutes and combine it with the second group of ingredients.
For the zucchini, it helps to have a sushi mat, but it's not essential. You can get sushi mats at Whole Foods or Asian markets. You can also just use a place mat covered with parchment or wax paper .
Arrange the zucchini slices so they overlap and form a rectangle. Double up to cover any weak spots :
Eh, well...you know what they say about
OK, let's do this:
Easier Than It Looks Gluten Free Manicotti
makes 6 servings
prep time 20 min, bake time 35 min
Filling:
1 T olive oil
1/2 red onion, diced
3 handfuls spinach
2 cloves garlic, minced
-----------------
8 oz container ricotta
1 cup shredded parmesan, plus extra for sprinkling
1 t dried oregano
1/4 t salt
1 egg
-----------------
Instead of noodles:
2 large zucchinis sliced very thinly on your little hand slicer
-----------------
marinara sauce, jarred or homemade
fresh basil for garnish
Preheat the oven to 375ºF
Heat the oil in a pan over medium heat and cook the spinach and garlic for about 3 minutes, stirring frequently. Allow it to cool for a couple minutes and combine it with the second group of ingredients.
For the zucchini, it helps to have a sushi mat, but it's not essential. You can get sushi mats at Whole Foods or Asian markets. You can also just use a place mat covered with parchment or wax paper .
Arrange the zucchini slices so they overlap and form a rectangle. Double up to cover any weak spots :
Add about 1/2 cup of the filling in a horizontal line across the bottom of the zucchini.
Carefully roll the whole thing up:
Pour about a cup of marinara sauce in the bottom of the baking dish. Arrange the rolls and bake uncovered for 30 minutes. Top with a little sauce and shredded parmesan and crank the oven up to broil for 5-10 minutes, or until cheese is a melted and golden. Garnish with chopped basil. Or gin.
Monday, November 29, 2010
Beet It! Just Beet It!
Well darlings, Thanksgiving is over so that means it's salad time until we all drop the 3lbs we gained over the weekend. I'm saying "we" because you guys gained that much, too, right? RIGHT?!
OK, let's do this:
Beet Salad with Orange and Fennel
makes 6 servings
prep time 2 min, total time 30 min-ish
1 bunch beets, any color, leaves & stems removed
1 t orange zest
1 navel orange
1/4 c balsamic vinegar
2 T olive oil
salt & pepper, to taste
6 handfuls lettuce
1/2 small fennel bulb, sliced thinly on your awesome new slicer
handful of goat cheese, optional
Bring a pot of water to a boil and boil the beets until fork tender (cooking time will vary based on how big the beets are). Once they're done, run them under some cold water and slip the skins right off. It's fun! And slimy! Cut into bite-sized chunks and set aside to cool.
Meanwhile, zest the orange and set the zest aside.
Next you're going to supreme the orange.
You: "What! I don't know what the hell that means!"
Me: "Chill out, freak."
All supreming means is that you're going to get all the pith (white part) and peel off the citrus sections.
Here's how:
Cut the top and bottom off with a sharp knife. Put a flat side down on the cutting board and use the knife to cut the peel and pith off, top to bottom. You'll lose a little pulp, but if you work in small sections you can minimize it.
Next you're going to hold the peeled orange in one hand over a bowl and carefully cut between the membranes to remove just the yummy pulp section with no membrane or white stuff.
Congratulations! You're a Supreme Stud(-ette)!
Pour the juice that was collected in the bowl into a small pot or pan and add the vinegar and zest. Bring to a simmer and reduce to about 1/3 the original amount. Remove from the heat and set aside.
You just made balsamic/orange reduction!!
Now toss the beets, orange sections, fennel slices and lettuce in the olive oil, salt & pepper. Arrange in a little pile on a plate and drizzle with the balsamic/orange reduction. Sprinkle with goat cheese if using (I wasn't, but only because I didn't have any).
Bonus points: chop a little of the fennel greens and sprinkle on.
Today's lessons that apply to other recipes:
Making a reduction
Supreming citrus
You have learned so much today! Go have a glass or six of wine - you've earned it.
OK, let's do this:
Beet Salad with Orange and Fennel
makes 6 servings
prep time 2 min, total time 30 min-ish
1 bunch beets, any color, leaves & stems removed
1 t orange zest
1 navel orange
1/4 c balsamic vinegar
2 T olive oil
salt & pepper, to taste
6 handfuls lettuce
1/2 small fennel bulb, sliced thinly on your awesome new slicer
handful of goat cheese, optional
Bring a pot of water to a boil and boil the beets until fork tender (cooking time will vary based on how big the beets are). Once they're done, run them under some cold water and slip the skins right off. It's fun! And slimy! Cut into bite-sized chunks and set aside to cool.
Meanwhile, zest the orange and set the zest aside.
Next you're going to supreme the orange.
You: "What! I don't know what the hell that means!"
Me: "Chill out, freak."
All supreming means is that you're going to get all the pith (white part) and peel off the citrus sections.
Here's how:
Cut the top and bottom off with a sharp knife. Put a flat side down on the cutting board and use the knife to cut the peel and pith off, top to bottom. You'll lose a little pulp, but if you work in small sections you can minimize it.
Next you're going to hold the peeled orange in one hand over a bowl and carefully cut between the membranes to remove just the yummy pulp section with no membrane or white stuff.
Congratulations! You're a Supreme Stud(-ette)!
Pour the juice that was collected in the bowl into a small pot or pan and add the vinegar and zest. Bring to a simmer and reduce to about 1/3 the original amount. Remove from the heat and set aside.
You just made balsamic/orange reduction!!
Now toss the beets, orange sections, fennel slices and lettuce in the olive oil, salt & pepper. Arrange in a little pile on a plate and drizzle with the balsamic/orange reduction. Sprinkle with goat cheese if using (I wasn't, but only because I didn't have any).
Bonus points: chop a little of the fennel greens and sprinkle on.
Today's lessons that apply to other recipes:
Making a reduction
Supreming citrus
You have learned so much today! Go have a glass or six of wine - you've earned it.
Wednesday, November 24, 2010
Dear Lanie J-
When I get invited to potlucks I usually just stop and buy some bean dip from Trader Joe's and call it a day. But this is Thanksgiving - The Big One. I need to step up my game. I also need to not work very hard. What do I do?
Best,
Hopelessly Lazy
--------------------------
HL-
First off - You're BUYING bean dip?! Sweet Smoking Baby, you people are worse than I thought. We'll rectify that next week. As far as Thanksgiving goes, I've got your back. You can actually make this recipe at the party in about 3 minutes.
Stay easy,
Lanie J
OK, let's do this:
Green Beans with Lemon
total time: 2 min
green beans
fresh lemon juice
olive oil
salt, to taste
Bring a large pot of water to a boil. Add the green beans and cover. The very second it starts to boil again, time 90 seconds. No more.
Take the beans out of the water right away and toss in a little olive oil, lemon juice and salt.
That's it. I'm not even measuring this one out for you, that's how much I trust you.
Best,
Hopelessly Lazy
--------------------------
HL-
First off - You're BUYING bean dip?! Sweet Smoking Baby, you people are worse than I thought. We'll rectify that next week. As far as Thanksgiving goes, I've got your back. You can actually make this recipe at the party in about 3 minutes.
Stay easy,
Lanie J
OK, let's do this:
Green Beans with Lemon
total time: 2 min
green beans
fresh lemon juice
olive oil
salt, to taste
Bring a large pot of water to a boil. Add the green beans and cover. The very second it starts to boil again, time 90 seconds. No more.
Take the beans out of the water right away and toss in a little olive oil, lemon juice and salt.
That's it. I'm not even measuring this one out for you, that's how much I trust you.
Email your cooking questions to CookStupidEasy@gmail.com
Tuesday, November 23, 2010
Uh-oh Spaghetti Squash-io!
I knew I shouldn't have joked about having a warm November. Now the high is only 61º here in LA and I have to roast stuff at 425º just to keep from getting frostbite.
OK, Let's do this:
Spaghetti Squash with Garlic Butter
Makes 4 servings
Hands on time 10 min, cook time 40 min
1 Spaghetti squash, cut lengthwise, seeds removed
3 T olive oil, divided
3 T butter (keep it vegan by using only olive oil
2 handfuls cherry tomatoes, cut in half
handful of basil, chopped
3 cloves garlic, minced
salt, to taste
Preheat oven to 425ºF. Drizzle the squash flesh with 1T olive oil. Place the squash cut side down on a baking sheet lined with parchment paper and roast for 40 min or until flesh is tender.
Meanwhile, heat remaining oil in a large saute pan over low/med heat. Cook the tomatoes and half of the basil for a few minutes, then add the garlic and butter and cook for another 10min, stirring frequently to avoid burning the butter and garlic.
Today's lesson that applies to other recipes:
Garlic and butter burn easily. Add them later than other ingredients and use lower heat.
Once the squash is cool enough to handle with a towel, scrape the flesh out with a fork. It will come off in spaghetti-like strands (get it?).
Toss the squash in with the butter sauce and salt to taste. Garnish with remaining basil leaves.
I don't have kids because they're grody, but I can't help but think this would be a good alternative to regular noodles with butter (which is also grody).
OK, Let's do this:
Spaghetti Squash with Garlic Butter
Makes 4 servings
Hands on time 10 min, cook time 40 min
1 Spaghetti squash, cut lengthwise, seeds removed
3 T olive oil, divided
3 T butter (keep it vegan by using only olive oil
2 handfuls cherry tomatoes, cut in half
handful of basil, chopped
3 cloves garlic, minced
salt, to taste
Preheat oven to 425ºF. Drizzle the squash flesh with 1T olive oil. Place the squash cut side down on a baking sheet lined with parchment paper and roast for 40 min or until flesh is tender.
Meanwhile, heat remaining oil in a large saute pan over low/med heat. Cook the tomatoes and half of the basil for a few minutes, then add the garlic and butter and cook for another 10min, stirring frequently to avoid burning the butter and garlic.
Today's lesson that applies to other recipes:
Garlic and butter burn easily. Add them later than other ingredients and use lower heat.
Once the squash is cool enough to handle with a towel, scrape the flesh out with a fork. It will come off in spaghetti-like strands (get it?).
Toss the squash in with the butter sauce and salt to taste. Garnish with remaining basil leaves.
I don't have kids because they're grody, but I can't help but think this would be a good alternative to regular noodles with butter (which is also grody).
Monday, November 22, 2010
Curry Deviled Eggs
Must...fight...urge...to...make...smelly jokes!
Seriously though, this dish is a simple yet impressive twist on a real crowd pleaser.
OK, let's do this:
Curry Deviled Eggs
Makes 24 pieces
Hands on time 10 min, total time 25 min
12 eggs
1/2 cup mayo
2 T mustard
1 T shallots, minced small
3 T celery, minced small
2 T pickle, minced small or pickle relish
1/4 t cayenne
1/2 T curry powder
salt and pepper, to taste
1 zip-loc baggie
Boil the eggs for 12 minutes, then set in a bowl of ice water. Once cooled, peel the eggs and slice lengthwise.
Pop the yolks into a bowl and combine with remaining ingredients. Use a fork to mash it up really, really well - it should be smooth. Ideally you should put it in your fabulous little food processor. What?! You didn't buy it yet?! That's just insane.
Take the plastic baggie and cut a teensie piece of the corner off. Congratulations! You just made a pastry bag! Fill the bag with the yolk mixture and gently squeeze it into the egg white halves.
Wanna Make it FANCY?!
If you take nothing else from this blog, remember this:
ARUGULA ALWAYS MAKES IT FANCY.
Place a few arugula leaves on a plate. Put the deviled egg on the arugula. Drizzle with a little olive oil and sprinkle with paprika. If you get any fancier you'll have to start cooking with elbow length black satin gloves. Even you, Jamil.
Thinking of taking these to a Thanksgiving potluck? Here's a trick:
Stick a short glass or bowl over one of the eggs to keep plastic wrap from sticking to the other eggs.
Seriously though, this dish is a simple yet impressive twist on a real crowd pleaser.
OK, let's do this:
Curry Deviled Eggs
Makes 24 pieces
Hands on time 10 min, total time 25 min
12 eggs
1/2 cup mayo
2 T mustard
1 T shallots, minced small
3 T celery, minced small
2 T pickle, minced small or pickle relish
1/4 t cayenne
1/2 T curry powder
salt and pepper, to taste
1 zip-loc baggie
Boil the eggs for 12 minutes, then set in a bowl of ice water. Once cooled, peel the eggs and slice lengthwise.
Pop the yolks into a bowl and combine with remaining ingredients. Use a fork to mash it up really, really well - it should be smooth. Ideally you should put it in your fabulous little food processor. What?! You didn't buy it yet?! That's just insane.
Take the plastic baggie and cut a teensie piece of the corner off. Congratulations! You just made a pastry bag! Fill the bag with the yolk mixture and gently squeeze it into the egg white halves.
Wanna Make it FANCY?!
If you take nothing else from this blog, remember this:
ARUGULA ALWAYS MAKES IT FANCY.
Place a few arugula leaves on a plate. Put the deviled egg on the arugula. Drizzle with a little olive oil and sprinkle with paprika. If you get any fancier you'll have to start cooking with elbow length black satin gloves. Even you, Jamil.
Thinking of taking these to a Thanksgiving potluck? Here's a trick:
Stick a short glass or bowl over one of the eggs to keep plastic wrap from sticking to the other eggs.
Friday, November 19, 2010
Weekend Calorie Splurge: Sorbet With Berry Balsamic Topping
This splurge is not too indulgent calorie-wise. Come to think of it, it does have balsamic vinegar in it.....let's just consider this one a salad.
OK, let's do this:
Balsamic Sorbet Topping
Total hands on time 8 min, chill time 5 min
makes about 6 servings
1/4 c balsamic vinegar
1 ish cup of frozen mixed berries
2 T maple syrup or agave nectar
1 cap full of vanilla (use the cap from the vanilla bottle)
Your favorite flavored sorbet (lemon, coconut or vanilla is awesome)
Combine all ingredients in a small pan over medium heat and simmer for about 10 minutes. Allow it to chill in the freezer for a few minutes so it doesn't melt the sorbet. Pour over sorbet. Boom. Done.


OK, let's do this:
Balsamic Sorbet Topping
Total hands on time 8 min, chill time 5 min
makes about 6 servings
1/4 c balsamic vinegar
1 ish cup of frozen mixed berries
2 T maple syrup or agave nectar
1 cap full of vanilla (use the cap from the vanilla bottle)
Your favorite flavored sorbet (lemon, coconut or vanilla is awesome)
Combine all ingredients in a small pan over medium heat and simmer for about 10 minutes. Allow it to chill in the freezer for a few minutes so it doesn't melt the sorbet. Pour over sorbet. Boom. Done.
Tuesday, November 16, 2010
Sass-squash
The sweetness of this butternut squash soup is balanced by a kick of cayenne pepper and ginger. It's kind of the Sookie Stackhouse of soup.
OK, let's do this:
Spicy Butternut Squash Soup
Makes 8-10 servings
Hands on time 20 minutes, cook time 45 minutes
1/4 t cayenne pepper
1/4 t ground cinnamon
1/4 t garam masala
1 T dried thyme
1 T dried sage
1/4 c olive oil
1 medium butternut squash
2 medium shallots diced
2 stalks celery, chopped
2 carrots, chopped
1 apple, cored and chopped
1 pear, cored and copped
1 1/2 inch ginger, peeled, minced
4-6 cups of veggie broth
Juice from 1/2 an orange
Salt, to taste
2 T maple syrup
1/4 cup heavy cream (optional)
Preheat the oven to 425ºF
Combine the spices and olive oil in a bowl.
Carefully peel the butternut squash. Hold it firmly and slice off the ends so you have a flat edge. Place a flat edge down and carefully slice the squash lengthwise. Use a spoon to scoop the seeds and stringy pulp out and discard it. That was the hardest part of this whole recipe. Go have a drink. You've earned it.
Chop the squash into 1 inch-ish chunks. It's best to keep the pieces about the same size so they roast in the same amount of time.
Toss the squash chunks in half of the oil/spice blend, then spread the pieces on baking sheets lined with parchment paper. Roast at 425ºF until pieces are tender - about 35 minutes.
While the squash is roasting, heat the remaining spice-oil in a large stock pot. Add the shallots and brown them. Add the carrots and celery and sauté them for 3 minutes or so. Add the apple, pear and ginger and sauté for another 5 minutes, stirring once in a while.
Add the broth, cover and reduce the heat. Allow to simmer until carrots are soft, then turn off the heat and stir in the roasted squash chunks. Transfer the chunky soup to a food processor in small batches and process until smooth.
Add the orange juice, maple syrup and cream (if using) and adjust seasoning.
Wanna make it FANCY?!
Try this:
Slice off a few rings of shallots or grab a couple fresh sage leaves. Toss them in some flour and fry them in just enough hot oil that they float a little. They'll get nice and crispy plus they'll look really cool, and so will you.
OK, let's do this:
Spicy Butternut Squash Soup
Makes 8-10 servings
Hands on time 20 minutes, cook time 45 minutes
1/4 t cayenne pepper
1/4 t ground cinnamon
1/4 t garam masala
1 T dried thyme
1 T dried sage
1/4 c olive oil
1 medium butternut squash
2 medium shallots diced
2 stalks celery, chopped
2 carrots, chopped
1 apple, cored and chopped
1 pear, cored and copped
1 1/2 inch ginger, peeled, minced
4-6 cups of veggie broth
Juice from 1/2 an orange
Salt, to taste
2 T maple syrup
1/4 cup heavy cream (optional)
Preheat the oven to 425ºF
Combine the spices and olive oil in a bowl.
Carefully peel the butternut squash. Hold it firmly and slice off the ends so you have a flat edge. Place a flat edge down and carefully slice the squash lengthwise. Use a spoon to scoop the seeds and stringy pulp out and discard it. That was the hardest part of this whole recipe. Go have a drink. You've earned it.
Chop the squash into 1 inch-ish chunks. It's best to keep the pieces about the same size so they roast in the same amount of time.
Toss the squash chunks in half of the oil/spice blend, then spread the pieces on baking sheets lined with parchment paper. Roast at 425ºF until pieces are tender - about 35 minutes.
While the squash is roasting, heat the remaining spice-oil in a large stock pot. Add the shallots and brown them. Add the carrots and celery and sauté them for 3 minutes or so. Add the apple, pear and ginger and sauté for another 5 minutes, stirring once in a while.
Add the broth, cover and reduce the heat. Allow to simmer until carrots are soft, then turn off the heat and stir in the roasted squash chunks. Transfer the chunky soup to a food processor in small batches and process until smooth.
Add the orange juice, maple syrup and cream (if using) and adjust seasoning.
Wanna make it FANCY?!
Try this:
Slice off a few rings of shallots or grab a couple fresh sage leaves. Toss them in some flour and fry them in just enough hot oil that they float a little. They'll get nice and crispy plus they'll look really cool, and so will you.
Labels:
apple,
Butternut squash,
cinnamon,
garam masala,
ginger,
gluten free,
pear,
soup,
vegan
Monday, November 15, 2010
Itsy Bitsy, Teeny Weenie, Little Dollop of Tahini
Now that you've undoubtedly ordered and received your Christmas present to yourself, let's break that bad boy in!
We're going to kick that addiction to store-bought hummus. You're better than that - or you will be in about 5 minutes.
OK, let's do this:
"Suck it, Sabra" Hummus
Makes 6 servings
Total time: 5 min
1 large clove of garlic
1 14oz can of garbanzo beans (same thing as chickpeas), drained, rinsed
Juice from 1 or 2 lemons
2 T water
1 1/2 T tahini
2 t ground cumin
1/4 t cayenne
1/4-1/3 c olive oil
salt, to taste
Combine all ingredients in your new food processor and process until smooth.
Too thick? Add more lemon juice, water or oil.
Too thin? Add a little more tahini
Put the hummus in a bowl and top with a little olive oil and cayenne. Serve with raw veggies and whole wheat pita.
We're going to kick that addiction to store-bought hummus. You're better than that - or you will be in about 5 minutes.
OK, let's do this:
"Suck it, Sabra" Hummus
Makes 6 servings
Total time: 5 min
1 large clove of garlic
1 14oz can of garbanzo beans (same thing as chickpeas), drained, rinsed
Juice from 1 or 2 lemons
2 T water
1 1/2 T tahini
2 t ground cumin
1/4 t cayenne
1/4-1/3 c olive oil
salt, to taste
Combine all ingredients in your new food processor and process until smooth.
Too thick? Add more lemon juice, water or oil.
Too thin? Add a little more tahini
Put the hummus in a bowl and top with a little olive oil and cayenne. Serve with raw veggies and whole wheat pita.
Friday, November 12, 2010
Weekend Calorie Splurge: Poached Pears
It's a frigid 73ºF here in Los Angeles. What better way to get all warm 'n' cozy than with cinnamon and red wine poached pears stuffed with vanilla mascarpone and candied walnuts?
"But Lanie J, I can't make that! IT'S TOO FANCY!"
Bullshit. I've got your back.
OK, let's do this:
Fancy Pants Cinnamon Poached Pears
Makes 8 servings
Prep time 5 min, cook time 30-40 min
For the pears:
4 firm pears - we're talking apple firm, people
1 bottle cheap red wine, new, not nasty almost vinegar wine (we'll use that for other stuff)
water
1 T ground cinnamon
1 t vanilla extract (splurge on the good kind)
For the filling:
8oz container of mascarpone cheese (available everywhere, even at Trader Joe's)
1 t vanilla extract
2 t agave nectar or maple syrup
For the topping
2 handfuls chopped walnuts
1 1/2 T sugar, agave nectar or maple syrup
1/2 t cinnamon
Peel the pears, but leave a little skin near the stems and butts. Place them in a pot that holds all 4 without too much extra room.
Pour in the wine a little more than halfway. Add water until the pot is almost full, but not so full it's going to boil over and make your stove a mess. I believe in saving wine stains for your teeth.
Cover and bring to a boil, then remove cover and reduce to a strong simmer. Allow to simmer for 30-40 minutes or until a fork can be easily inserted (but not so they're mushy). If the pears float in the pot, you'll need to rotate them occasionally with a spoon.
Meanwhile, combine filling ingredients and set in the fridge until needed.
In a pan over medium heat add the topping ingredients all at once. Stir continuously until walnuts are just toasted and coated with sugar about 2 minutes. Remove them from the heat and set aside.
Once pears are done, cut them in half LENGTHWISE and place in the freezer for 10 minutes.
While the pears are cooling, dump out all but an inch of the poaching liquid and bring it back to a boil. Allow it to simmer until it's reduced by at least half. It will be syrupy. That's good.
Once the pears are cool, use a spoon to scoop out the seeds and any chewy-looking internal stem thingies. Place tiny blob of the filling on a plate and set the pear on the blob. This will keep the pear from sliding all over and ruining the look.
Next scoop a bigger blob of filling into the space you just scooped out of the pear. Sprinkle the candied walnuts on top. Now for the fanciness. Get a small spoonful of the syrup you made be reducing the wine. Hold the spoon vertically so most of the syrup runs off back into the pot - you just want a tiny stream coming off the spoon. Wave the spoon over the pear, drizzling the syrup like the artful master chef you are.
"But Lanie J, I can't make that! IT'S TOO FANCY!"
Bullshit. I've got your back.
OK, let's do this:
Fancy Pants Cinnamon Poached Pears
Makes 8 servings
Prep time 5 min, cook time 30-40 min
For the pears:
4 firm pears - we're talking apple firm, people
1 bottle cheap red wine, new, not nasty almost vinegar wine (we'll use that for other stuff)
water
1 T ground cinnamon
1 t vanilla extract (splurge on the good kind)
For the filling:
8oz container of mascarpone cheese (available everywhere, even at Trader Joe's)
1 t vanilla extract
2 t agave nectar or maple syrup
For the topping
2 handfuls chopped walnuts
1 1/2 T sugar, agave nectar or maple syrup
1/2 t cinnamon
Peel the pears, but leave a little skin near the stems and butts. Place them in a pot that holds all 4 without too much extra room.
Pour in the wine a little more than halfway. Add water until the pot is almost full, but not so full it's going to boil over and make your stove a mess. I believe in saving wine stains for your teeth.
Cover and bring to a boil, then remove cover and reduce to a strong simmer. Allow to simmer for 30-40 minutes or until a fork can be easily inserted (but not so they're mushy). If the pears float in the pot, you'll need to rotate them occasionally with a spoon.
Meanwhile, combine filling ingredients and set in the fridge until needed.
In a pan over medium heat add the topping ingredients all at once. Stir continuously until walnuts are just toasted and coated with sugar about 2 minutes. Remove them from the heat and set aside.
Once pears are done, cut them in half LENGTHWISE and place in the freezer for 10 minutes.
While the pears are cooling, dump out all but an inch of the poaching liquid and bring it back to a boil. Allow it to simmer until it's reduced by at least half. It will be syrupy. That's good.
Once the pears are cool, use a spoon to scoop out the seeds and any chewy-looking internal stem thingies. Place tiny blob of the filling on a plate and set the pear on the blob. This will keep the pear from sliding all over and ruining the look.
Next scoop a bigger blob of filling into the space you just scooped out of the pear. Sprinkle the candied walnuts on top. Now for the fanciness. Get a small spoonful of the syrup you made be reducing the wine. Hold the spoon vertically so most of the syrup runs off back into the pot - you just want a tiny stream coming off the spoon. Wave the spoon over the pear, drizzling the syrup like the artful master chef you are.
Wednesday, November 10, 2010
¡Holy Frijoles!
Don’t let the long list of ingredients scare you – it’s all normal stuff. This Black Bean Soup is perfect for when you need to throw something together in a hurry but still want a hearty, healthy meal.
This recipe makes a lot of soup. Store it in mason jars (or old pasta sauce jars) in the fridge or wait ’til it cools and store it in plastic in the freezer. Never put hot food in plastic. It’s gross and I wont be your friend anymore.
OK, let's do this:
Black Bean Soup
makes 8-10 servings
prep time: 5 min, cook time: 20 min
1 T sunflower or other high heat oil
1 1/2 cup onions, diced
1 heaping Tbsp ground cumin
1 T dried oregano
1 teaspoon chili powder
1/2 t salt
1/4 t cayenne (more or less depending on personal preference)
1/2 t fennel seeds
1/2cup carrots, diced
1/2cup celery, diced
1/2 zucchini, diced
3 cloves garlic, minced
1 28oz can diced tomatoes (lightly drained)
4 cups vegetable stock
2 14oz cans black beans, drained, rinsed thoroughly
1/2 c chopped cilantro
1/2 c corn (frozen is fine)
1/4 c good olive oil
Heat oil in a large pot over high heat. Add onions and cook until they’re translucent – about 3 min.
Add spices and stir to combine.
When the spices start to stick to the bottom of the pan, add the tomatoes and kind of scrape the bottom of the pot to get all the good toasty onion and spice bits off.
Add the veggie stock, carrots and celery and cover the pot. When it begins to boil, turn the heat down to Med-high and add the zucchini, garlic. Cover and allow the soup to gently boil until the carrots are tender, but not mushy – about 15 min.
When the carrots are tender, add the remaining ingredients (Black beans, corn, cilantro). Allow to simmer for a couple minutes, then remove 1 or 2 cups of the soup and blend it, then stir it back into the pot. This will thicken the soup. If you have an immersion blender, that’s even better – run it for about 15 seconds. If you’re using a regular blender, be careful with hot liquid…put a towel over the top. If you have no blender, don’t stress – it will still be great, just broth-ier.
Garnish with a couple slices of avocado and a dollop of sour cream or shredded cheese. Look at you, you sexy Soup Master!
This recipe makes a lot of soup. Store it in mason jars (or old pasta sauce jars) in the fridge or wait ’til it cools and store it in plastic in the freezer. Never put hot food in plastic. It’s gross and I wont be your friend anymore.
OK, let's do this:
Black Bean Soup
makes 8-10 servings
prep time: 5 min, cook time: 20 min
1 T sunflower or other high heat oil
1 1/2 cup onions, diced
1 heaping Tbsp ground cumin
1 T dried oregano
1 teaspoon chili powder
1/2 t salt
1/4 t cayenne (more or less depending on personal preference)
1/2 t fennel seeds
1/2cup carrots, diced
1/2cup celery, diced
1/2 zucchini, diced
3 cloves garlic, minced
1 28oz can diced tomatoes (lightly drained)
4 cups vegetable stock
2 14oz cans black beans, drained, rinsed thoroughly
1/2 c chopped cilantro
1/2 c corn (frozen is fine)
1/4 c good olive oil
Heat oil in a large pot over high heat. Add onions and cook until they’re translucent – about 3 min.
Add spices and stir to combine.
When the spices start to stick to the bottom of the pan, add the tomatoes and kind of scrape the bottom of the pot to get all the good toasty onion and spice bits off.
Add the veggie stock, carrots and celery and cover the pot. When it begins to boil, turn the heat down to Med-high and add the zucchini, garlic. Cover and allow the soup to gently boil until the carrots are tender, but not mushy – about 15 min.
When the carrots are tender, add the remaining ingredients (Black beans, corn, cilantro). Allow to simmer for a couple minutes, then remove 1 or 2 cups of the soup and blend it, then stir it back into the pot. This will thicken the soup. If you have an immersion blender, that’s even better – run it for about 15 seconds. If you’re using a regular blender, be careful with hot liquid…put a towel over the top. If you have no blender, don’t stress – it will still be great, just broth-ier.
Garnish with a couple slices of avocado and a dollop of sour cream or shredded cheese. Look at you, you sexy Soup Master!
-------------------------------------------------------------------------------------------------------------------------
-------------------------------------------------------------------------------------------------------------------------
Look what Ana made!
Labels:
beans,
black beans,
gluten free,
soup,
tomatoes,
vegan
Tuesday, November 9, 2010
"Oooh! I LOVE arugula!"
Arugula is awesome, but people treat it as if it's impossible to find or something. People always gush over it. That's because people are dumb. You can use this to your advantage.
How to impress people in 3 easy steps:
1) Buy some arugula
2) Toss it with dressing
3) Put it on a plate
With quiche I like to add a little arugula salad. Partly because it looks awesome and partly because I like to try to balance eating pie crust first thing in the morning.
Here's how to make a kick ass dressing in less than 1 minute.
OK, let's do this:
Kick Ass Dijon Dressing
makes 6 servings
total time: 1 min
3 T Dijon mustard
2 T Mayo
1 or 2 T olive oil, you can choose the consistency. I'll let you.
1 T capers if you have them
salt and pepper to taste
Stir all ingredients together and toss over the arugula. Save the extra in a little jar for a week or so.
Bonus: Put it on things like asparagus and broccolini and call it an "aioli," and pretend you're fancy!
How to impress people in 3 easy steps:
1) Buy some arugula
2) Toss it with dressing
3) Put it on a plate
With quiche I like to add a little arugula salad. Partly because it looks awesome and partly because I like to try to balance eating pie crust first thing in the morning.
Here's how to make a kick ass dressing in less than 1 minute.
OK, let's do this:
Kick Ass Dijon Dressing
makes 6 servings
total time: 1 min
3 T Dijon mustard
2 T Mayo
1 or 2 T olive oil, you can choose the consistency. I'll let you.
1 T capers if you have them
salt and pepper to taste
Stir all ingredients together and toss over the arugula. Save the extra in a little jar for a week or so.
Bonus: Put it on things like asparagus and broccolini and call it an "aioli," and pretend you're fancy!
Subscribe to:
Posts (Atom)